Understanding Swirl Marks on Cars and How to Remove Them
Introduction:
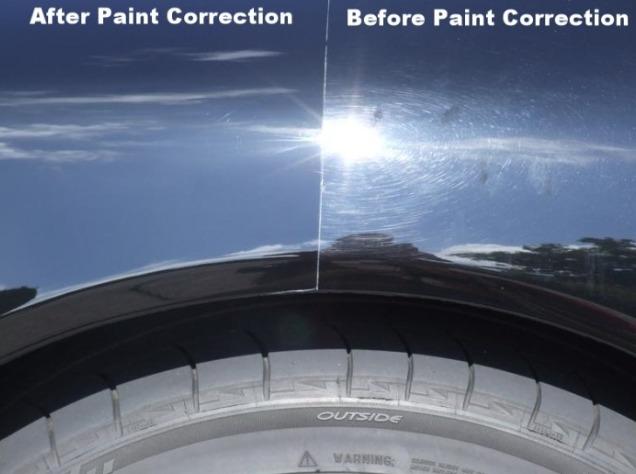
Swirl marks, also known as spider webbing or wash marring, are fine scratches that appear on the surface of a car’s paint. They’re typically caused by improper washing and drying techniques, as well as by using abrasive materials or products. While Swirl marks are unsightly, they can be removed with the right tools and techniques. In this blog post, we’ll delve into what causes swirl marks and how you can effectively remove them to restore your car’s paint to its former glory.
What Causes Swirl Marks?
Improper Washing: Using dirty sponges, brushes, or towels during the washing process can pick up dirt particles and grind them into the paint, causing swirl marks.
Incorrect Drying: Towel drying with rough or dirty cloths can create friction against the paint surface, leading to swirl marks.
Automatic Car Washes: Brushes and rollers in automatic car washes can accumulate dirt and debris over time, which can scratch the paint surface.
Poor Quality Products: Using abrasive polishes, waxes, or cleaning materials can also contribute to swirl marks.
How to Remove Swirl Marks:
Wash the Car Thoroughly: Start by washing the car using a pH-balanced car wash shampoo and a soft microfiber wash mitt to remove any dirt and debris.
Inspect the Paint: After washing, inspect the paint surface under good lighting conditions to identify the extent of the swirl marks.
Clay Bar Treatment: Use a clay bar to remove any embedded contaminants on the paint surface, ensuring a smooth foundation for polishing.
Choose the Right Polish: Select a high-quality swirl remover polish specifically designed to eliminate fine scratches and swirl marks.
Application of Polish: Apply a small amount of polish onto a foam or microfiber applicator pad and work it into the affected areas using light pressure.
Polishing Technique: Use a dual-action polisher or orbital buffer to evenly distribute the polish and gently abrade the surface to remove swirl marks.
Work in Sections: Divide the car into manageable sections and work on one area at a time to ensure thorough coverage and effective removal of swirl marks.
Buffing and Wiping: After polishing, use a clean microfiber towel to buff off the excess polish residue and reveal the restored paint surface.
Apply a Protective Coating: Finish by applying a layer of wax or sealant to protect the newly polished surface and enhance its shine.
Conclusion:
Swirl marks can detract from the appearance of your car’s paint, but with the right approach, they can be effectively removed to restore a smooth and glossy finish. By following proper washing techniques and using quality products, you can prevent swirl marks from reoccurring and keep your car looking its best for years to come. Remember to always work carefully and patiently when removing swirl marks to avoid causing further damage to the paint surface.
The post Understanding Swirl Marks on Cars and How to Remove Them appeared first on Fixcraft Blogs.
This post first appeared on The Top 5 Basic Car Maintenance Activities To Prepare Your Car For The Next Road Trip, please read the originial post: here

